So you’ve created an amazing landing page to promote a special offer. You’ll need form conversion to turn your hard work into leads.
Where you place your forms, how they’re designed, and the language in your call-to-action all shape your visitor experience. Get these elements right, and you can grow your lists.
This post explores how you can optimize your forms to gather high-quality leads. You’ll learn the following:
A “good” conversion rate falls between 2% to 5%, according to CRO platform company Adoric. However, Hubspot research from 2020 found that only 22% of companies were satisfied with their conversion rates. Email collection forms were the most successful method for converting customers, with a 15% conversion rate in 2020.
10 Tips to Optimize Form Conversion
If you want to transform your underperforming lead-generation forms, you’ll need to give both your webpage and the form itself a refresh. Start with these 10 tips to optimize form conversion.
1. Move your form above the fold.
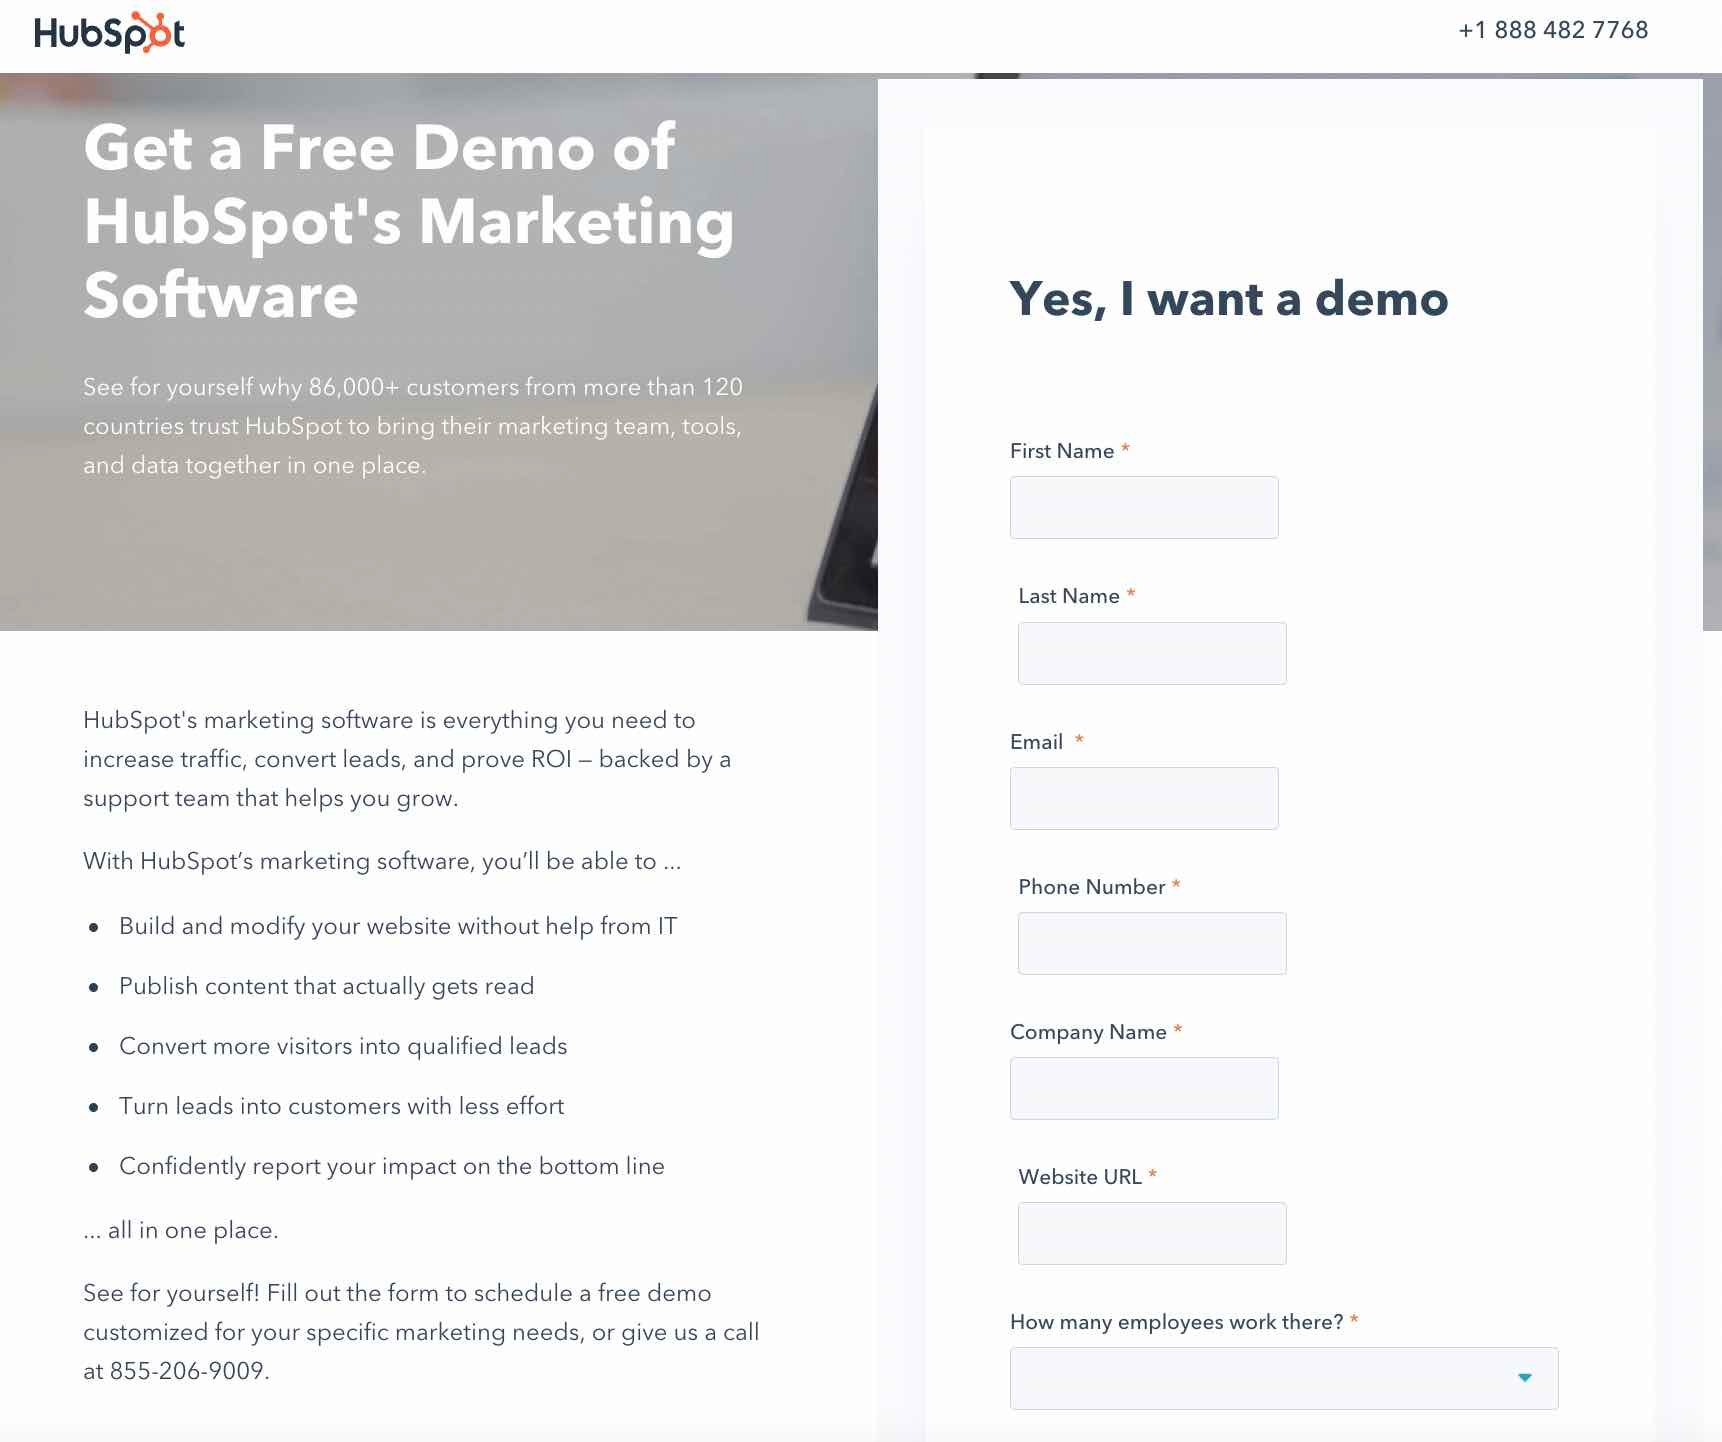
Conversion forms should be above the fold on your landing page. That means visitors shouldn’t have to scroll down the page to see your form. There’s no need to search to find your offer. Doing this removes friction from your lead generation process.
For example, visitors on the landing page below instantly know they’ll need to fill out the free demo form.
2. Make your form headline a call-to-action.
Encourage visitors to complete your form by making your headline a call-to-action. This tells your visitors exactly what they will get once they sign up.
For example, the form below starts with the call-to-action, “Start Your Free Trial Now.” This call to action is then repeated in the button at the bottom of the form, reinforcing the message.
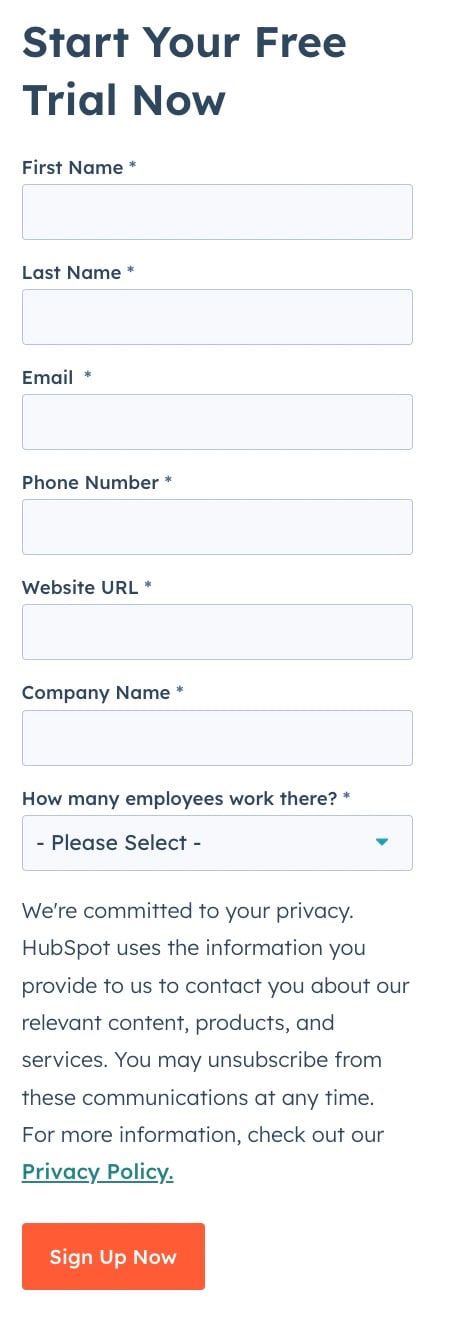
If you're unsure of what to include in your form headline, consider the following.
- Get Your Free [OFFER]
- Sign Up for [OFFER]
- Register for [WEBINAR/EVENT] Now!
- Yes, I Want This [OFFER]
- Download the [OFFER]
- Claim Your [OFFER]
- Save Your Seat at [WEBINAR/EVENT]
3. Include the right number of fields.
When it comes to creating your form fields, use the Goldilocks method: Try to find the number that’s just right.
A long form will overwhelm people and dissuade them from filling it out. However, shorter forms can generate a high number of submissions, but your leads may be low quality. You’ll want to find the perfect number of fields to get high-quality leads without scaring prospects away.

The length of your form depends on two factors.
- The offers stage in your buying cycle. If you're giving away a free checklist or infographic, you might only want to collect first name, last name, and email. However, more substantial lead magnets, like an ebook or whitepaper, indicate the prospects are further along the research process. In these cases, ask for more detailed information.
- How many leads you generate. If your sales team has many leads to sift through, add more fields to your forms so your reps can better qualify each lead, and identify those worth calling. While more fields may produce fewer leads, these leads are often better.
4. Make the required form fields noticeable.
If you're still wary about your form length, determine which information is a must-have vs. a nice-to-have.
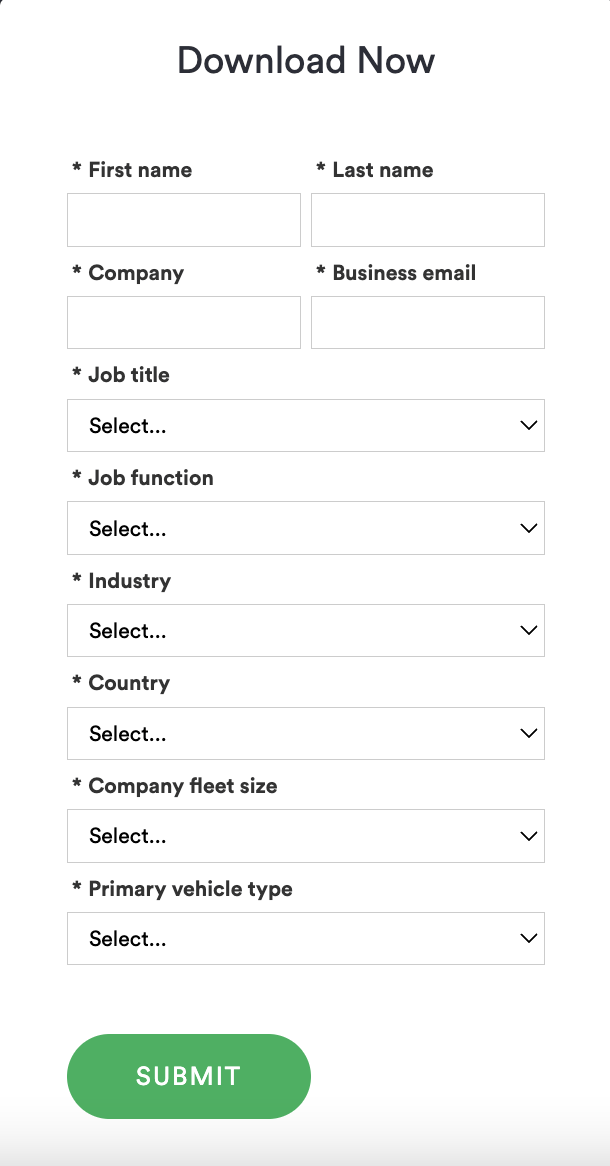
For example, fleet safety software company Nauto built the form below to get sales-qualified leads. Besides the regular form fields, they have required fields for job title, company fleet size, and primary vehicle type.
This compulsory information leads to fewer, but better, leads. Put another way, their sales reps will effectively use their time to close these leads.
You can typically denote required fields with an asterisk (*). Optional fields will not have an asterisk.
5. Hide previously completed fields.
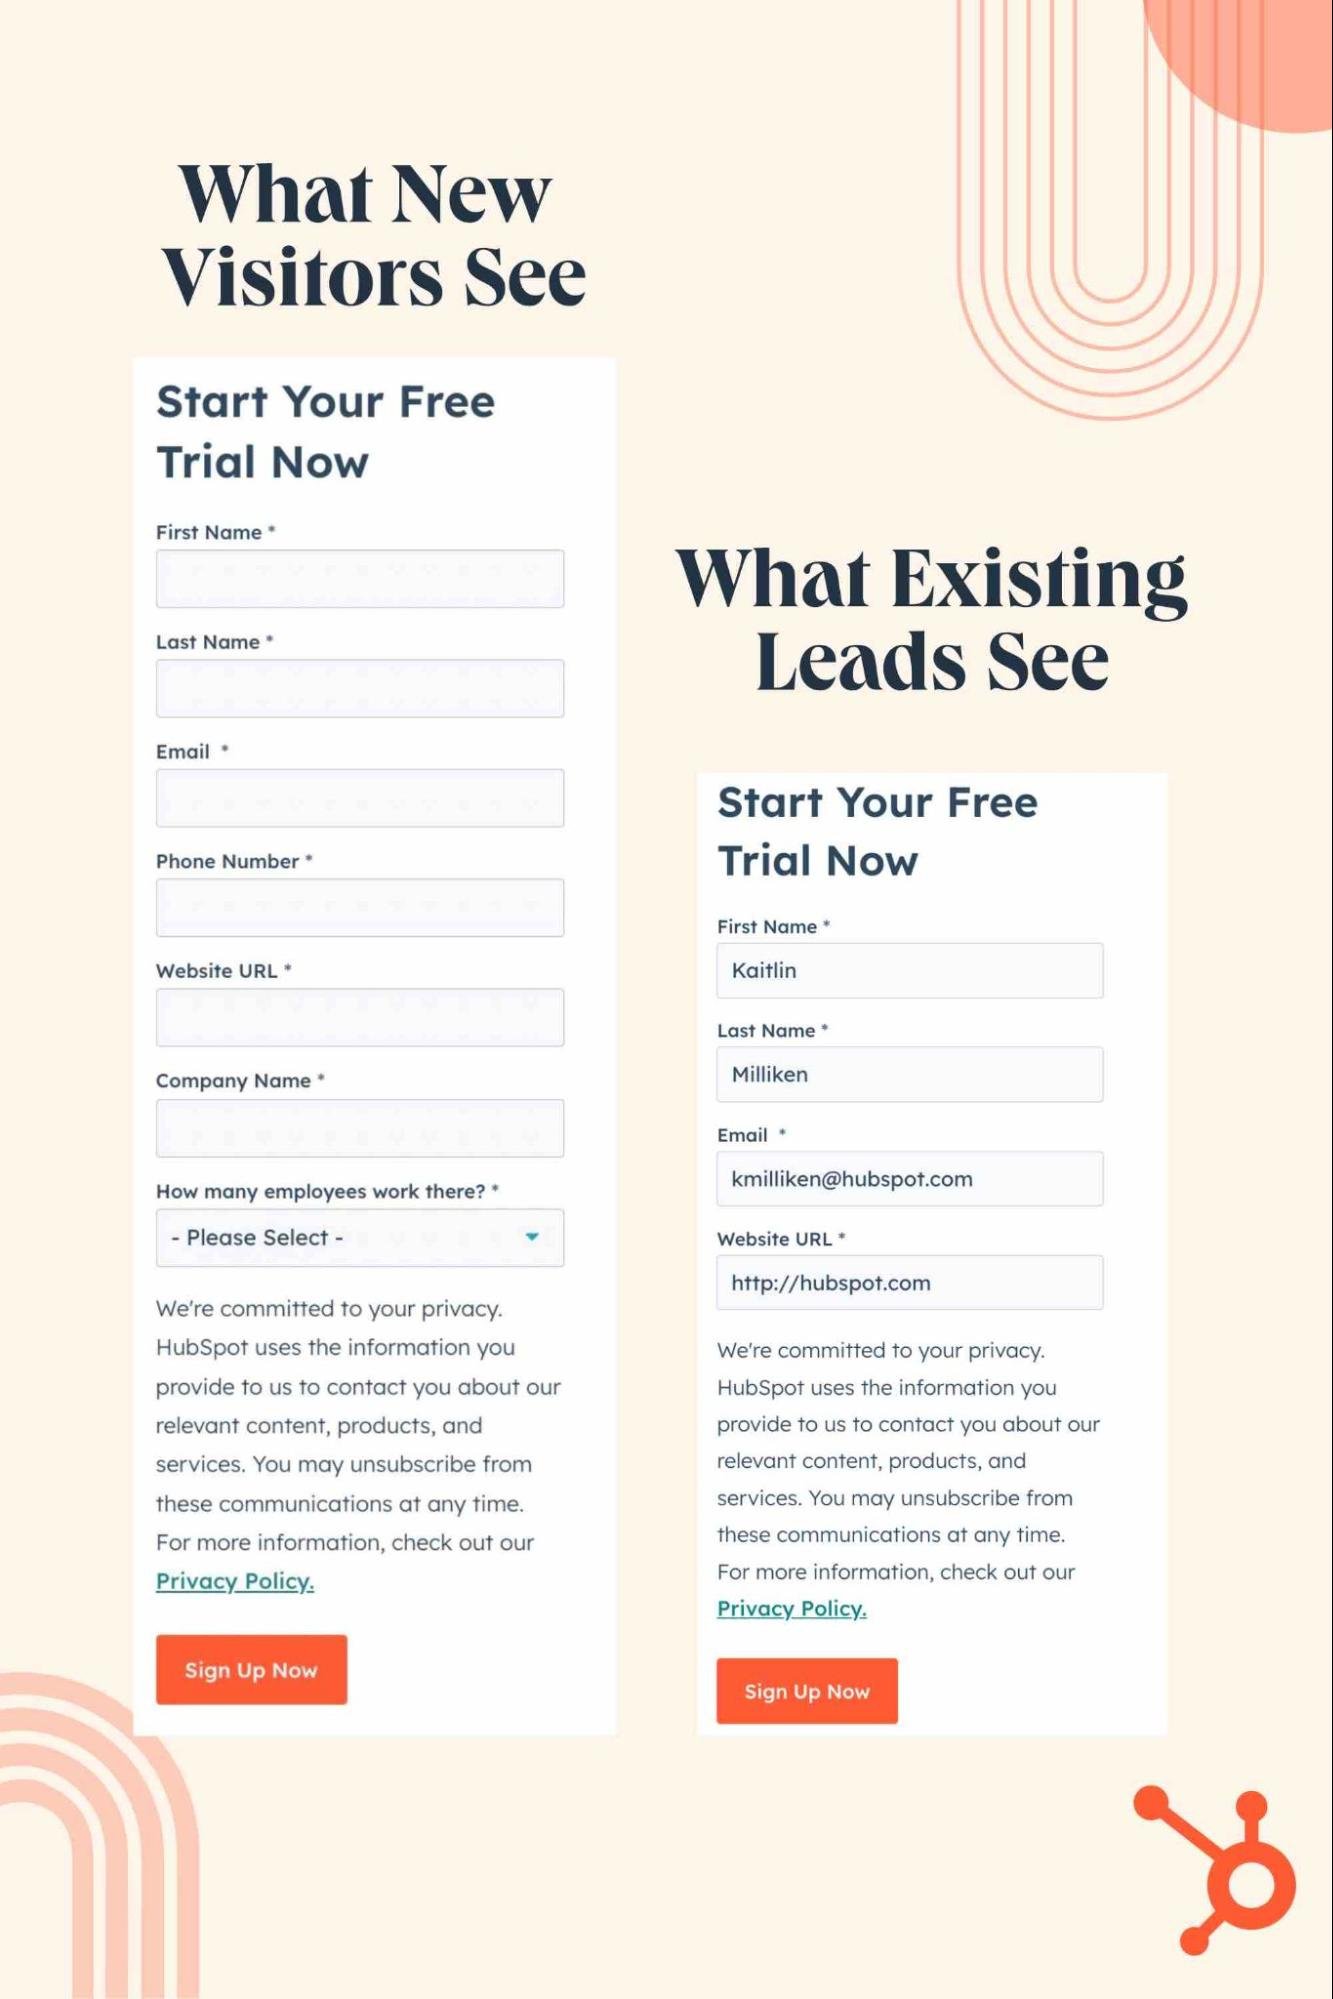
For first-time visitors, HubSpot's conversion forms are long. We get a lot of leads, so we need extra form fields to determine the lead quality. This allows us to correctly rotate the leads to the right reps.
However, we only show these extra fields to first-time visitors. Notice the difference in the form?
We did this by enabling smart form fields. Smart form fields can allow you to get your contacts’ information the first time they sign up to receive an offer.
The best part? They create a better user experience for visitors because you can generate questions specific to a set of your audience.
6. Edit your submit button.
After studying the landing pages of over 40,000 HubSpot customers, we found buttons labeled “Submit” had lower conversion rates. Meaning, the default text of your submission button will cause missed opportunities.
Your submit button offers a final chance to convince visitors to fill out those last few fields. To get better conversions from this button, customize the text based on your offer.
Here are some examples.
- Download This eBook
- Sign Me Up for a Demo
- Show Me This Presentation
- Claim Your Coupon
- Save Your Seat
These calls-to-action are all more enticing than “submit.”
7. Do an A/B test to choose your CTA color.
Randomly choosing a CTA color is not ideal. An A/B test can help you make an informed decision.
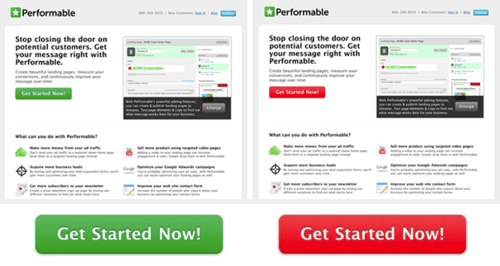
Early on, Performable ran a test using green and red CTA buttons. What did they find? Conversion rates for the red button were 21% more than the green button.
Pro tip: Understanding color psychology is a great first step to picking a CTA color. However, if you want to really find out what color resonates, consider using A/B tests to find the color with the highest conversion rates.
8. Guarantee the privacy of your visitors.
The laws of the United States, European Union, Canada, and Australia require you to link to your privacy policy. Besides allaying the fear of hesitant visitors, a privacy policy makes you seem trustworthy. This can increase your conversions.
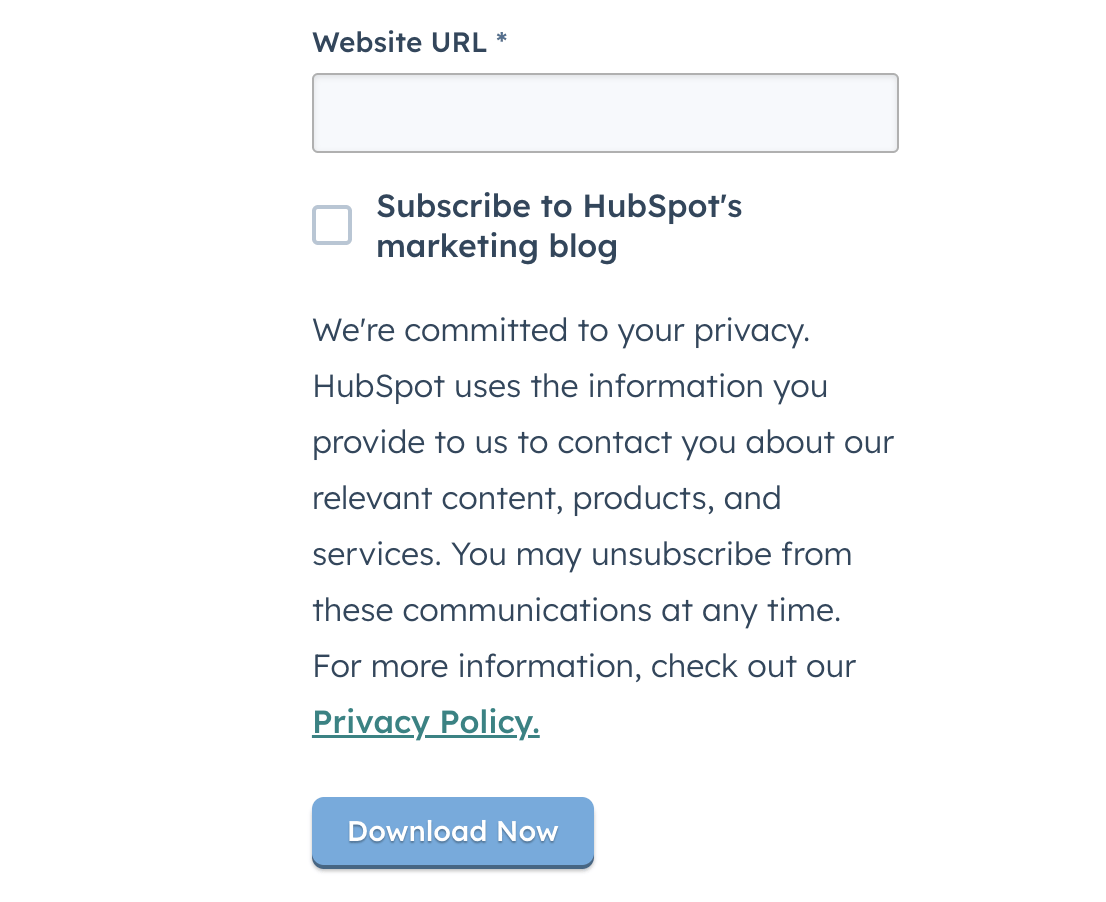
In your form, you can link to your privacy policy before the submission button while including a snippet. Here’s how this looks on our forms.
If you don’t know what should go on your privacy page, get some ideas from HubSpot’s privacy policy. People want to know how we'll use their contact information, making this page one of the most visited on our site.
9. Use the right form layout.
Choosing the right form layout involves knowledge of human behavior. The best forms create a frictionless experience for potential leads. Here’s how you can optimize your form’s layout.
- Place form labels above the corresponding input fields.
- Do not separate a form into more than one column.
- Only ask one question per row.
- Match the size of input fields to the expected length of the answer.
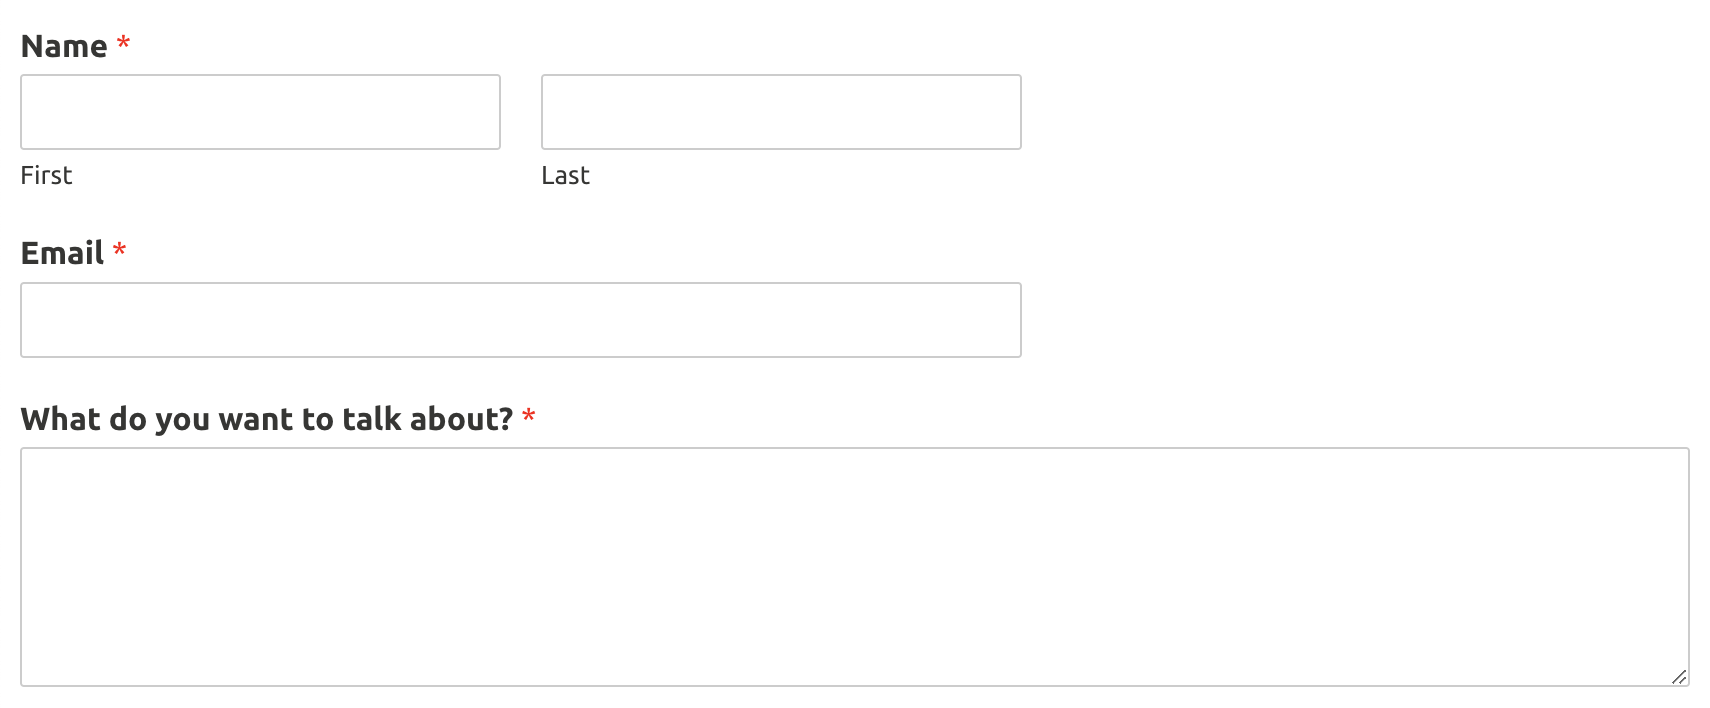
Let’s apply these best practices to the form below.
The input field lengths are ideal for both first and last names. However, the email field is not optimized, as most professional emails aren’t that lengthy.
10. Consider multi-page forms.
Perhaps you need to gather more user data to find qualified leads. A lengthy, single-page form may scare off potential prospects. You can instead create a form with multiple pages to break up the user experience.
Let’s look at the form below as an example.
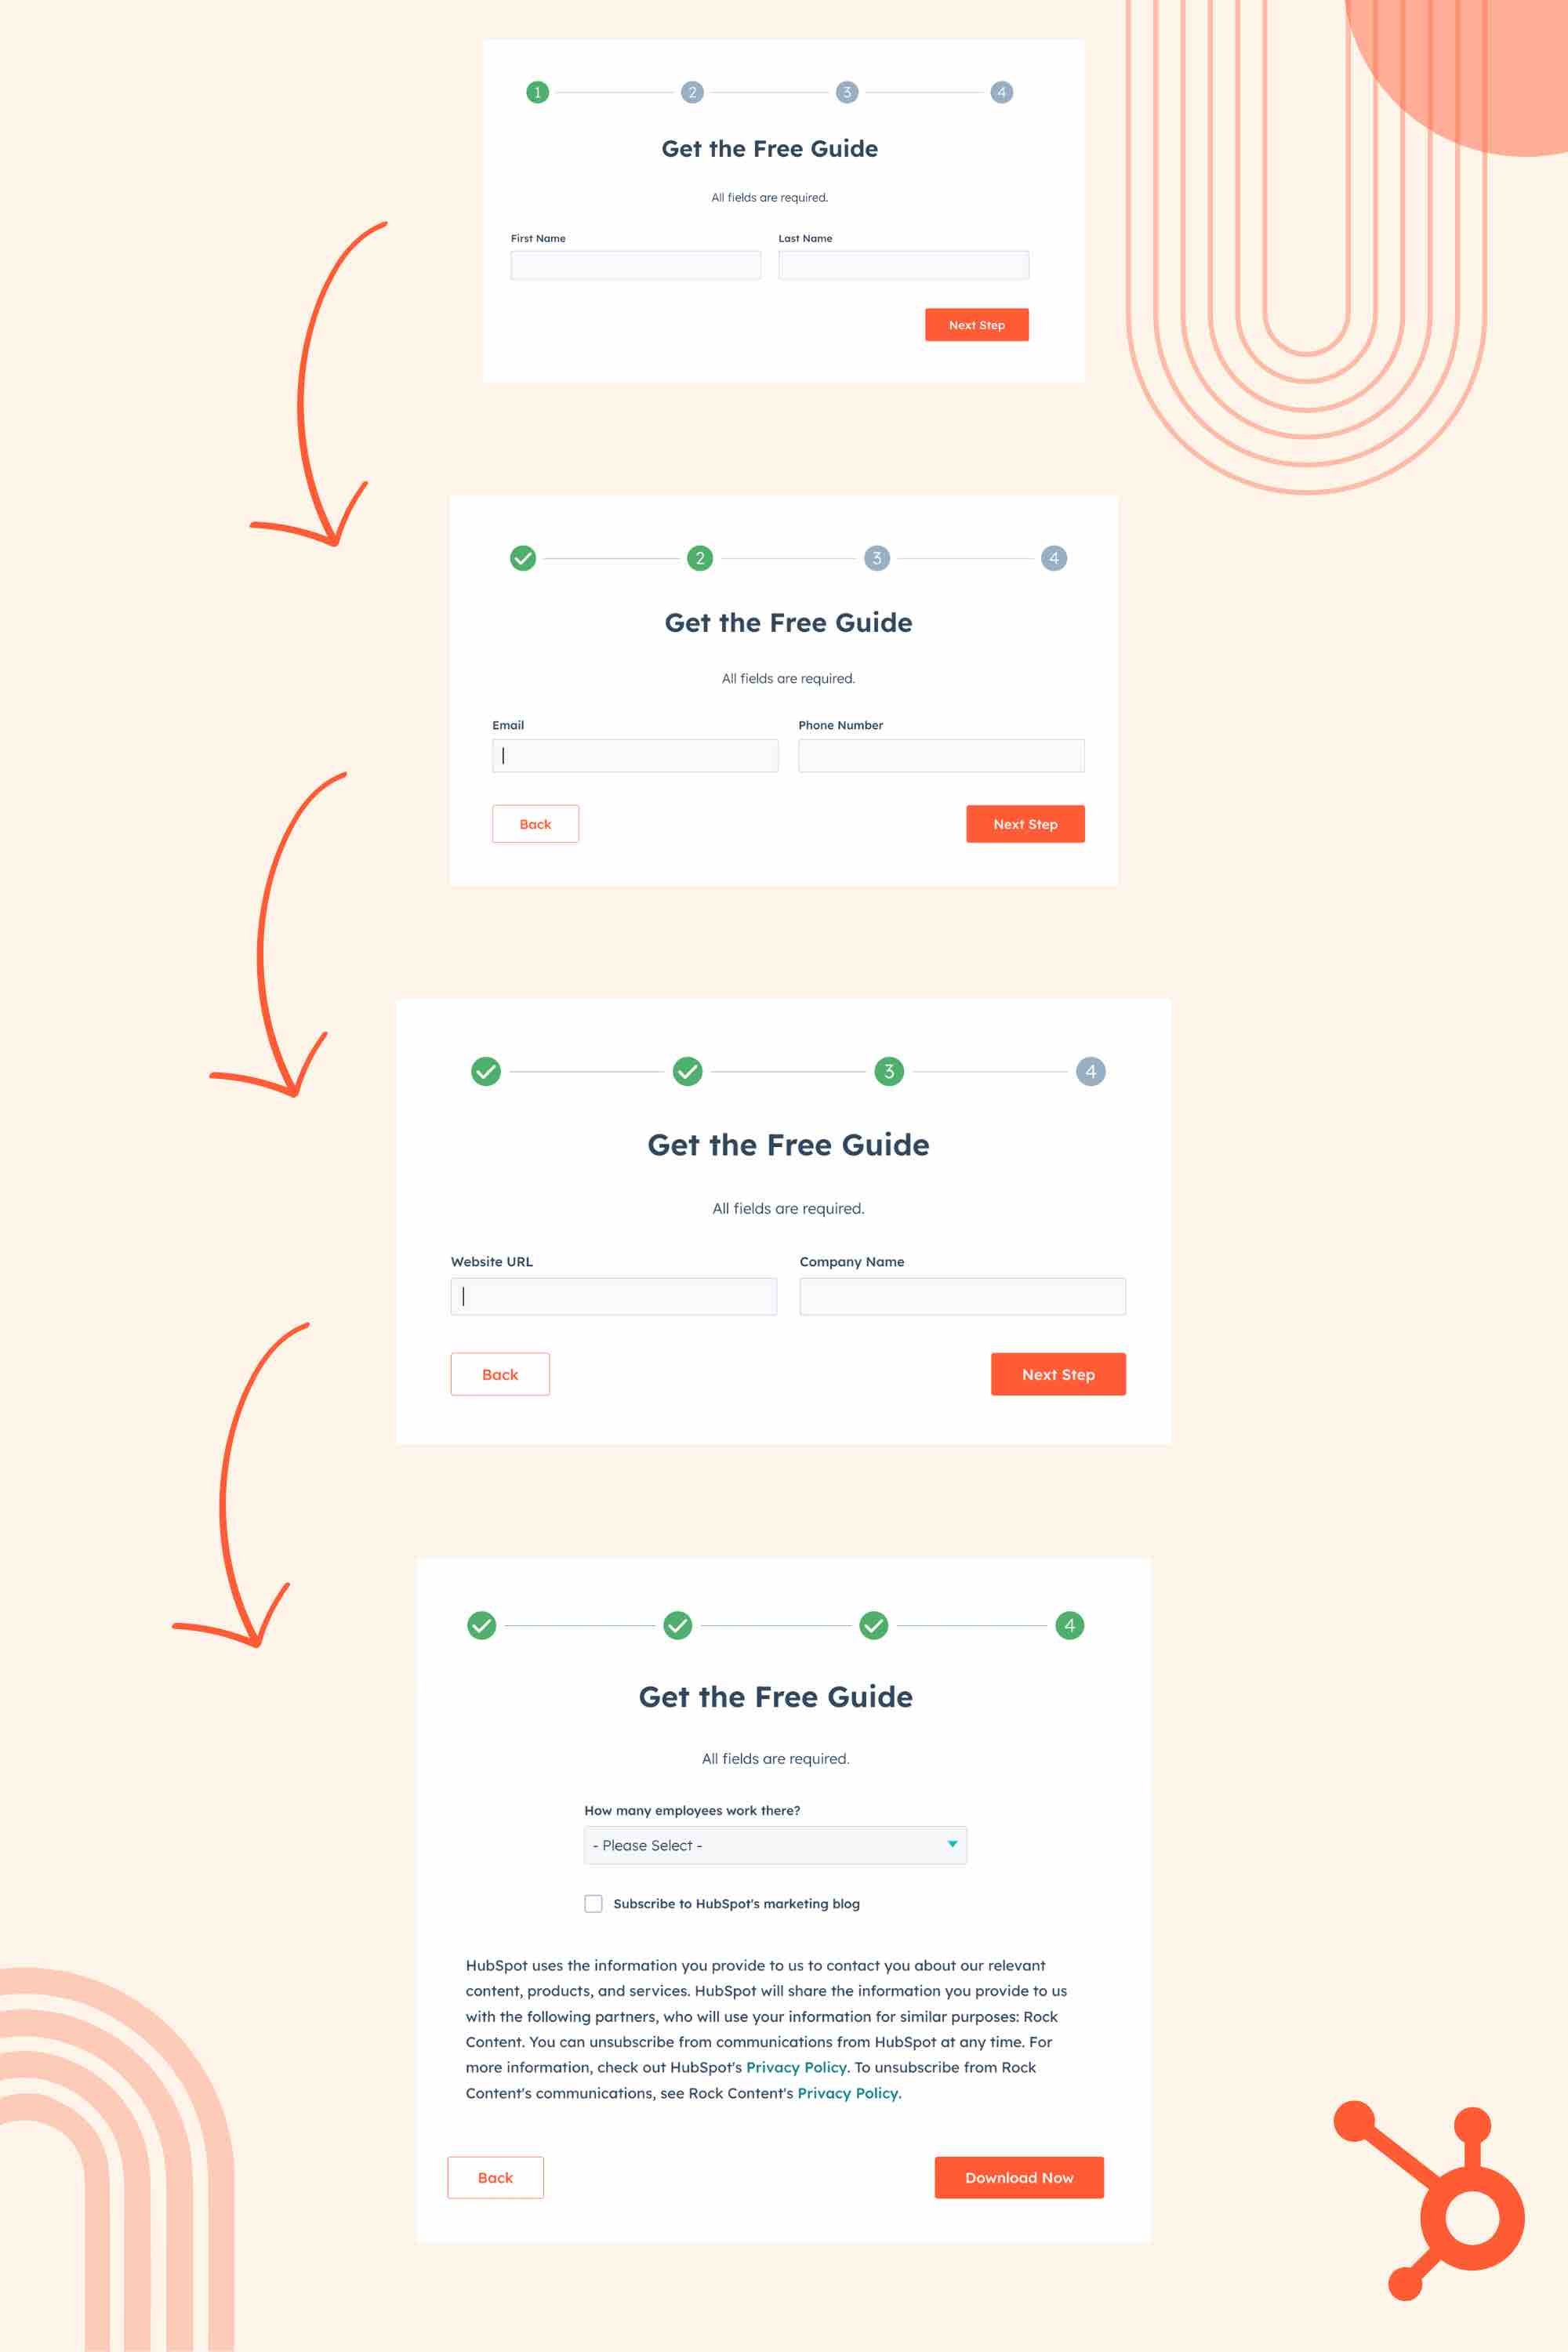
The first page asks simply for the visitor’s name. The second page gathers the person’s contact information, and the third gathers information about the person’s business. The final page asks for the size of the company.
Each page of the form asks for more information than the last. However, by creating multiple, easy steps, the visitor isn’t overwhelmed by the amount of information they need to share.
Getting Started with Form Conversion
Simply asking for information isn’t enough. Your forms have to create a frictionless user experience to create leads. You’ll also need compelling offers bolstered by top-notch design and the right message.
Becoming a form conversion expert will take time. Remember: Increasing your conversion rate will involve trial and error. Experiment with different messaging and placements to see what works. Make note of the best practices that work specifically for your organization.



Recent Comments