Your Facebook Business Page is one of the most important online properties for your business.
Why? Because it’s where you connect with customers, respond to feedback, engage with new buyers, and simply tell Facebook’s 2.9 billion users what time your shop is open on Tuesdays.
Facebook Business Pages also have a bunch of parts to set up and manage—which can feel like a bit of a hassle.
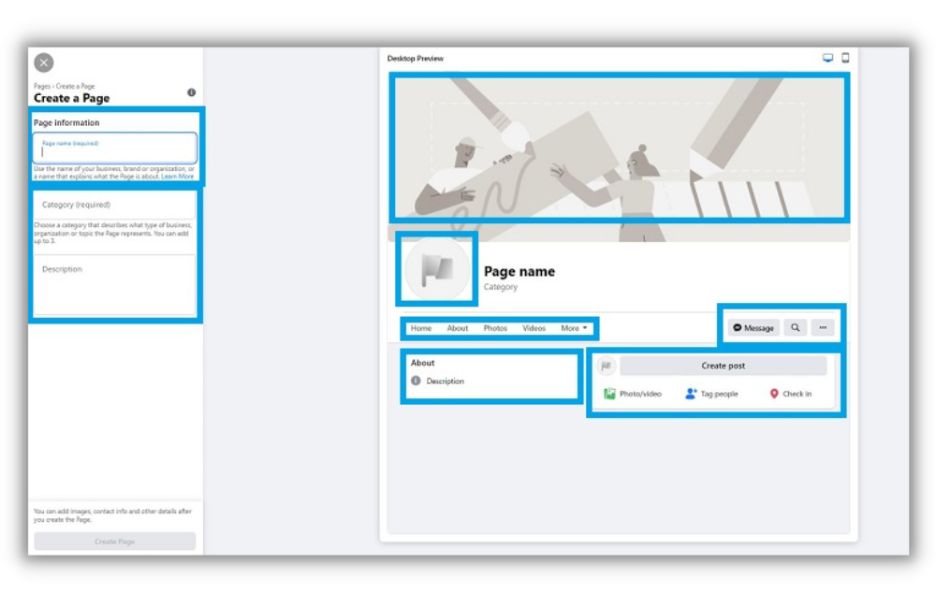
But with a little guidance, all those details become big opportunities for your business to shine on the world’s largest social media platform.
Let’s demystify your Facebook Business Account with a quick step-by-step process that’ll have you set up in no time. Then, let’s look at a few ways to make your new account more professional and engaging so it attracts and converts more customers.
What is a Facebook Business Page?
A Facebook Business Page is a public page that represents a company, organization, or public figure (like a celebrity or politician).
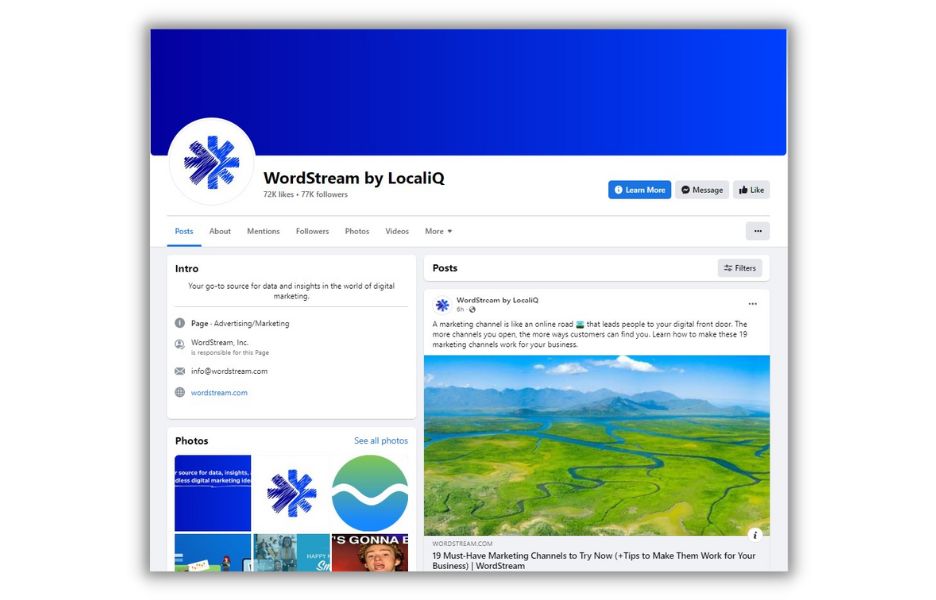
Brands can post pictures, videos, and text—just like on personal pages—for their fans to view, like, comment, and share. However, unlike most personal pages where people connect with a select group of friends and family, Business Pages are designed to promote an organization to its wider audience.
Facebook Business Pages are also distinguished by the content they share. Posts may include promotions about products, services, and sales. Posts may be educational or they may introduce followers to important people in the organization. Compare that with the cute cat pics and informal tone of most personal pages.
If you want to place ads or run a Facebook Shop, you’ll need to set up a Facebook Business Account and page. So, let’s get started.
7 easy steps to create a Facebook Business Page
We’ve broken down the setup process into eight steps and, pinky swear, they’re all really easy.
Step 1: Create a new Facebook Business Page
To get started, click over to Facebook’s Create a Page and choose which kind of Business Page you want to create.
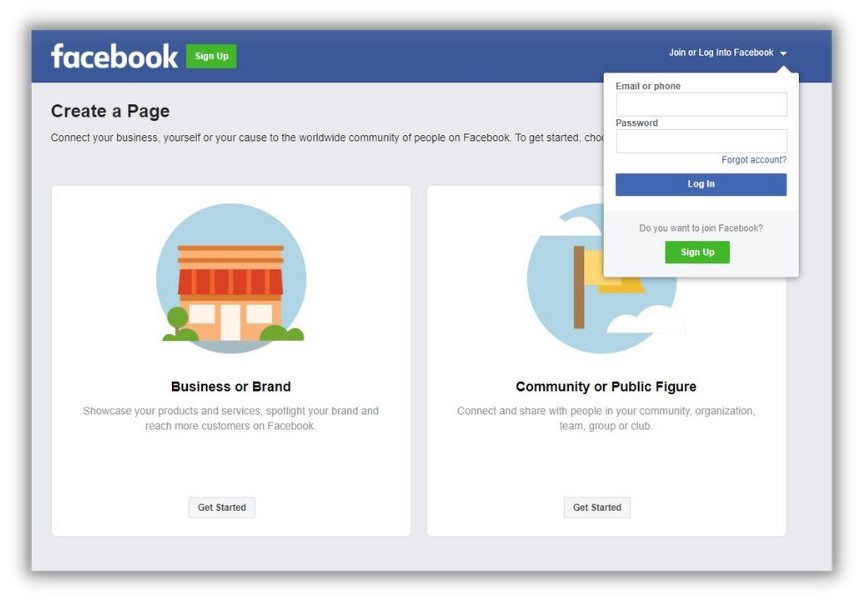
If you’re not logged into Facebook already, it’ll ask you to do so. That’s because you need to link your Business Account to a personal page.
Don’t worry, your personal information won’t be visible on your Business Page. But if you really want to keep work and personal life separate, you can create a second personal account using your work email. Then use that to open your Business Account.
Step 2: Enter basic information
The first screen you see is a blank version of your page with a few places to enter information on the left.
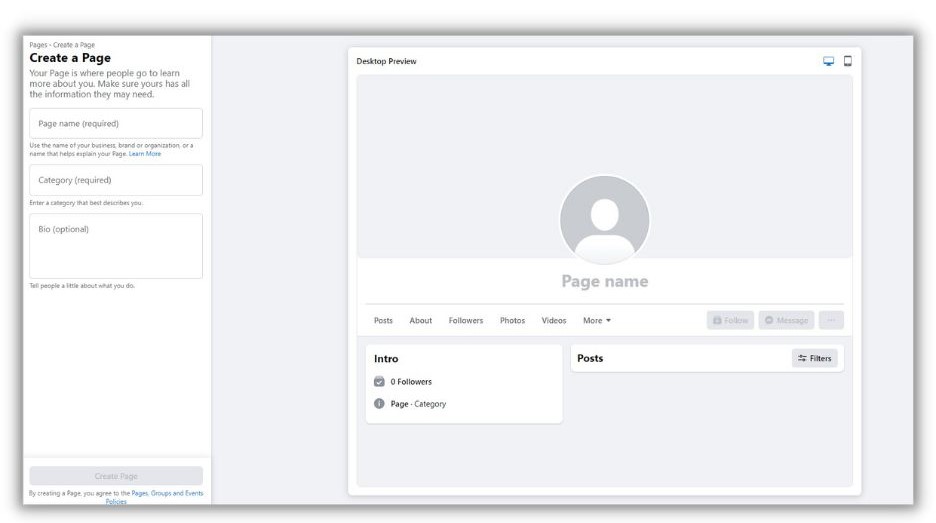
Name: The most obvious option is to use your business name. If there’s already business by the same, try adding a location or business type to differentiate. So “Larry’s” becomes “Larry’s Restaurant” or “Larry’s of Chicago.”
Category: Pick from the category that most closely matches what your business does. You can change this later, so don’t stress it too much.
Description: This is the first chance you have to tell the world about your business. Be concise and descriptive, but don’t shy away from a bit of boldness.
Click “Create Page” and your new Facebook Business Account is official, if still a bit bland.
Step 3: Complete the details
Now Facebook will ask you for some basic information about your business.
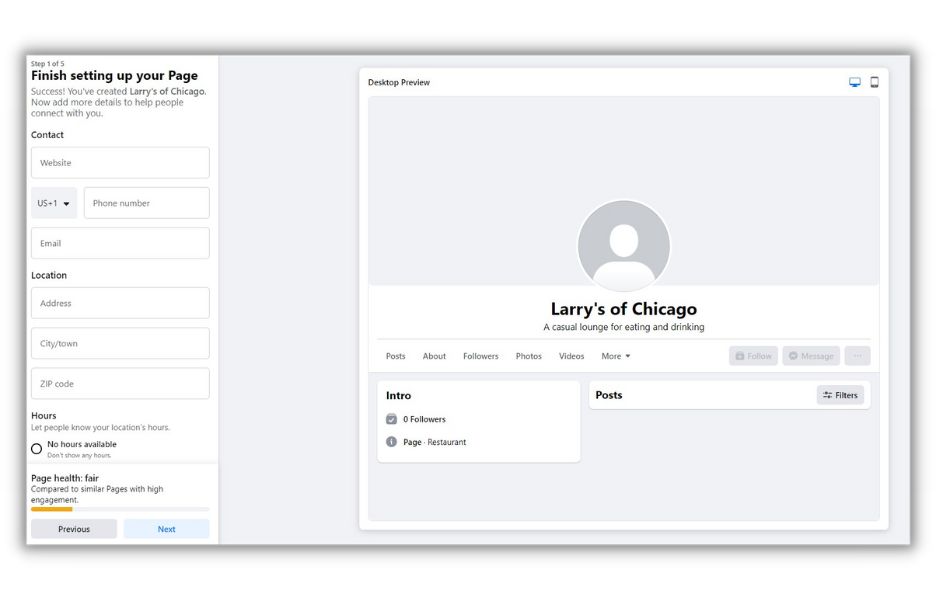
This part’s pretty self-explanatory. Just know that all these fields are options so only fill out what you want to go public.
Click “Next”
Step 4: Add images
Your next stop is where you’ll add images to your page.
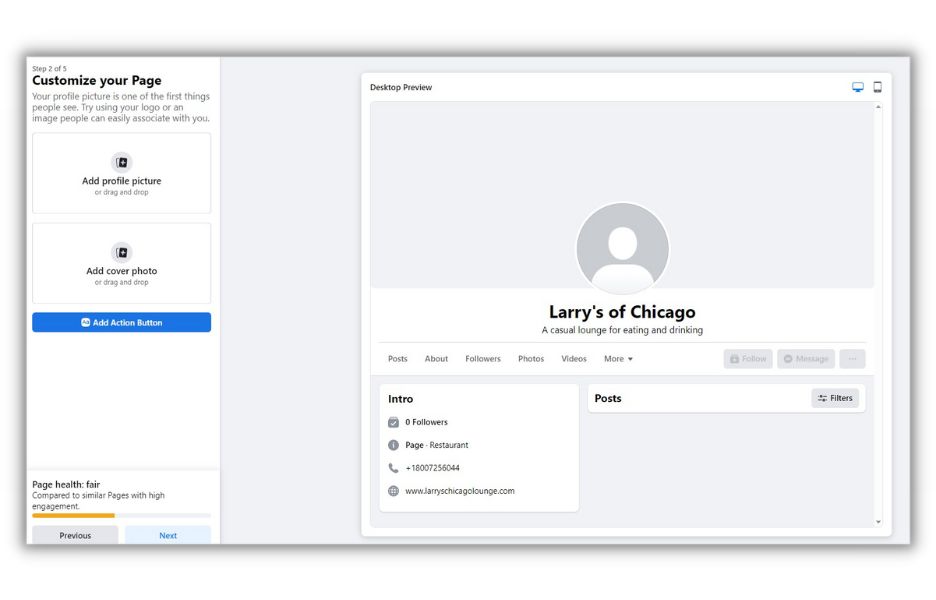
Facebook gives you lots of ways to spruce up your Business Page so it stands out to busy scrollers. Your cover picture is the most visible of all. Pick images that tell the world what you do while matching your brand.
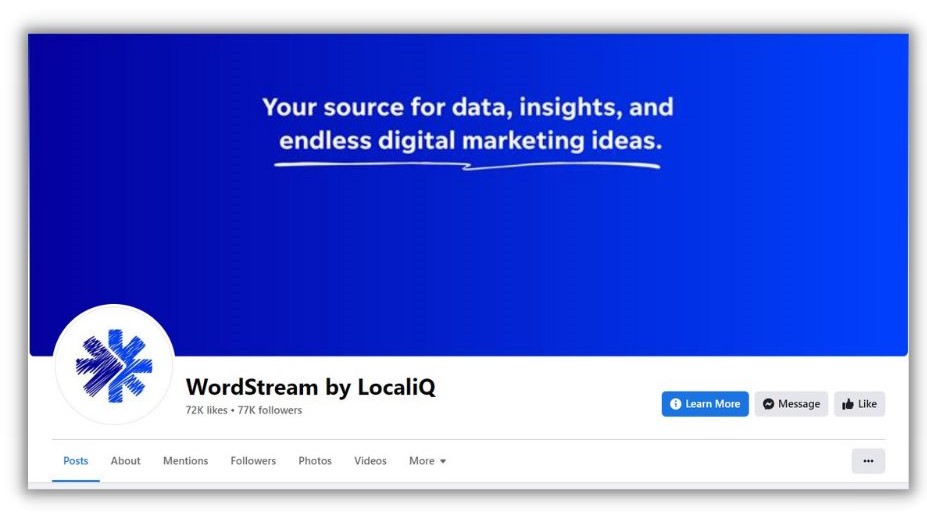
You have many options for your profile picture (that smaller image that sits at the lower left of your profile pic). If you’re a one-person show, try a pro headshot. Or consider a photo of your product, store, or an action shot of you doing what you do.
One thing to remember about your profile pic is that it’ll get cropped to fit the circular shape of its placement.
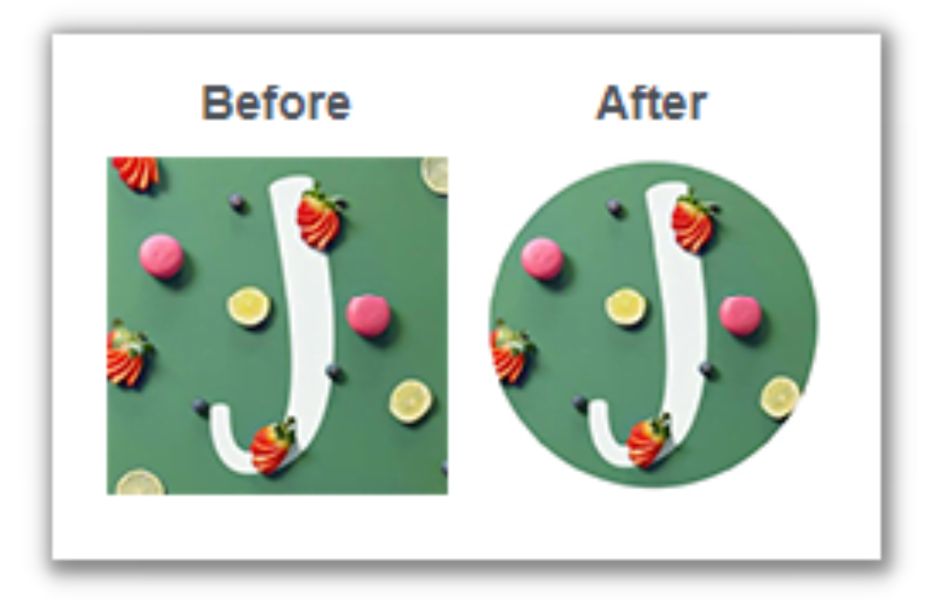
Make sure the pic you pick fits in the center of the circle.
Step 5: WhatsApp, friends, and notifications
Next, Facebook will take you through three pages asking for some choices. All three are optional. You can tap the “Skip” button at the bottom to bypass them.
The first asks you to add your WhatsApp account. Only do that if you want customers to message you.
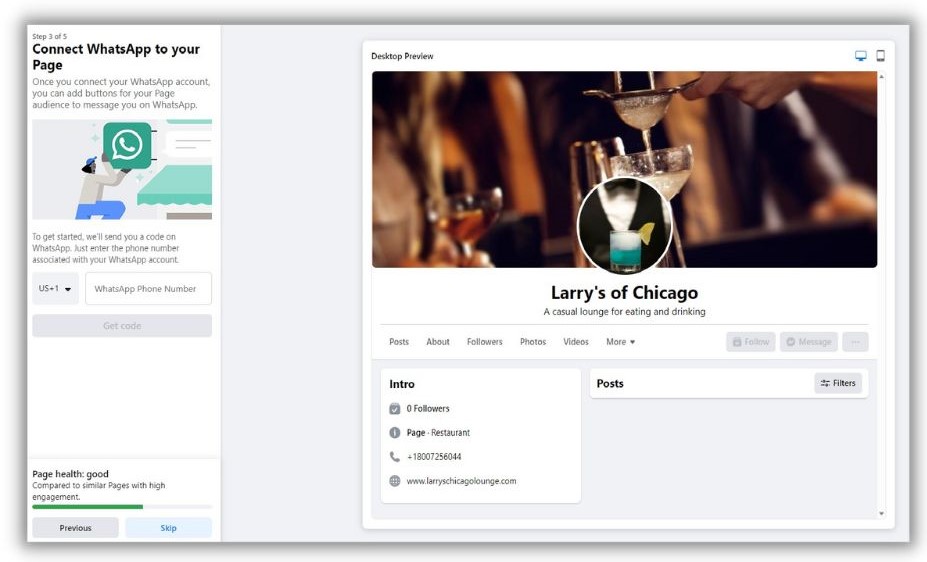
The next two ask if you’d like to invite friends to follow your page and if you want notifications. Make your selections or skip.
Step 6: Add an action button
An action button (often called a call to action, or CTA, button) is a shortcut you give to visitors so they can do something you really want them to do.
To add a CTA button to your page, click “Add an action button.”
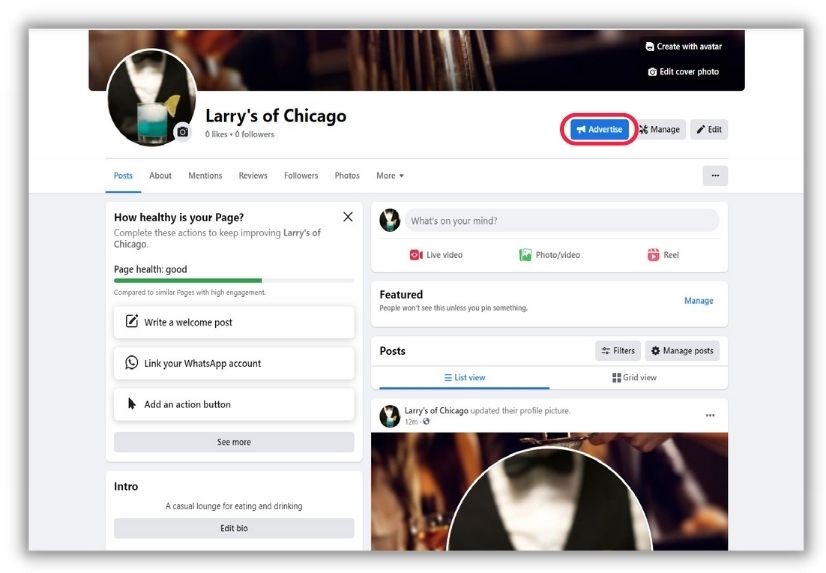
Once you click it, Facebook will give you several CTA options.
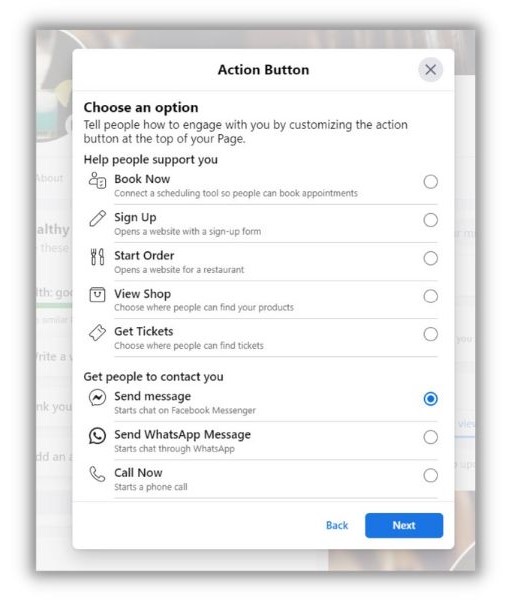
Depending on what you choose, you’ll need to connect a phone number, website, or service (like a food ordering app or ticket booking platform).
Step 7: Add more contact details
This is a simple but very important step. Especially if you’re a local business with regular hours of operation and a physical location.
To add information that helps people find you online and in person, click the “About” tab.
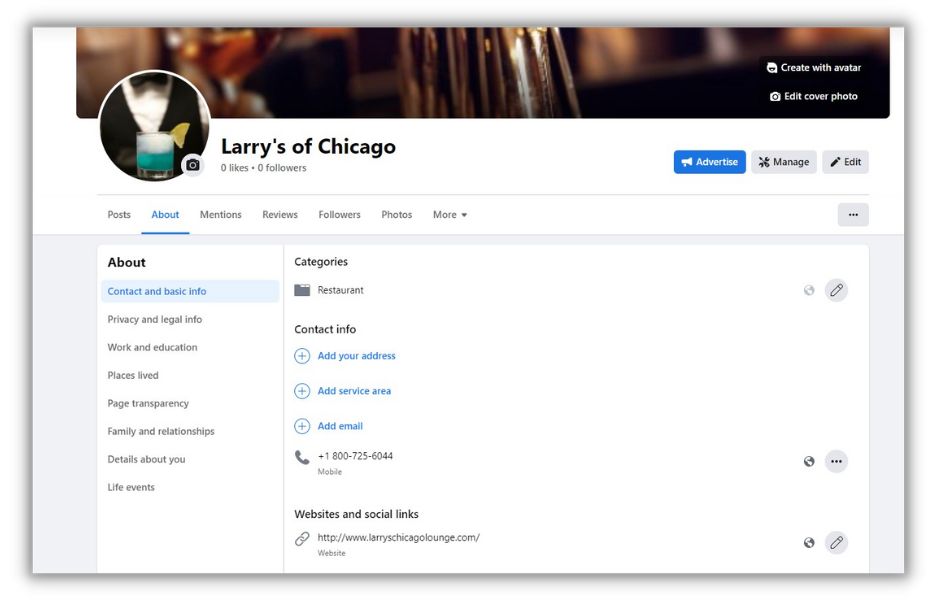
Then fill in whatever information you’d like people to see when they visit your Facebook Page.
And voila! You’ve completed the setup of your Facebook Business Page. You can start sharing all the wonderful things happening at your business through posts.
Pro tip: Once you set up your Page, you can start running paid Facebook ads. These Facebook ad targeting strategies will help you spend wisely and get more benefits for your Facebook buck.
Now, let’s add some features that’ll make your Page more attractive and professional.
Tips to optimize your Facebook Business Page
Just getting your Facebook Business Page launched is a big step (congrats!). We want to make sure it’s looking great and turning visitors into customers. Here are a handful of ways to level-up it up.
Create and pin a welcome post
When people first visit your page, they’ll likely read a post or two to decide if you’re worth following. You want your most engaging and convincing post to be what they see. Do that by writing a welcome post, then pinning it so it keeps its spot at the top of your Page.
Facebook will ask if you want to write a welcome post. You can follow that link or just write a post where it asks “What’s on your mind?”
Once you’ve written something welcoming, pin it to your Page by clicking “Manage” in the Featured section.
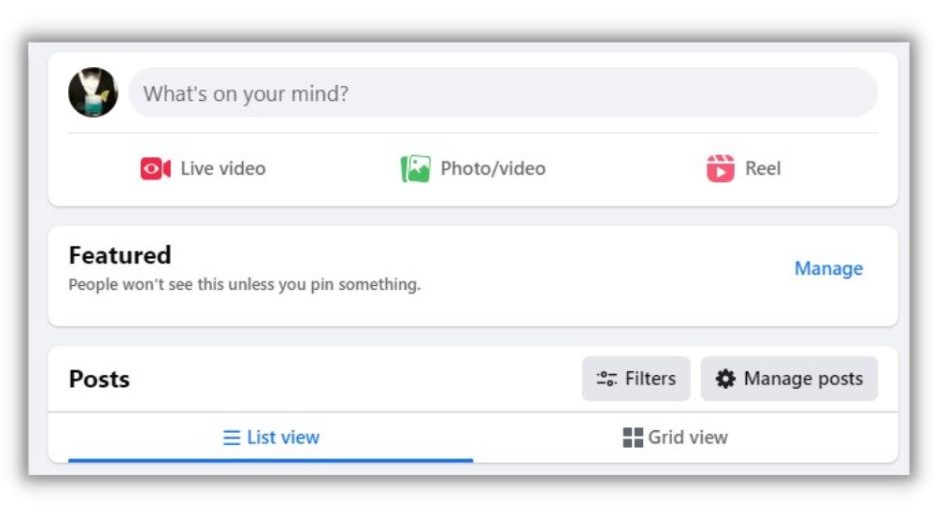
You’ll get a popup window showing your recent posts. Pic your welcome message and it’ll pin for you.
Customize your Page tabs
Page tabs are how visitors navigate around your Facebook Business Page. You automatically get several on the visible tab bar and a bunch more in the dropdown menu.
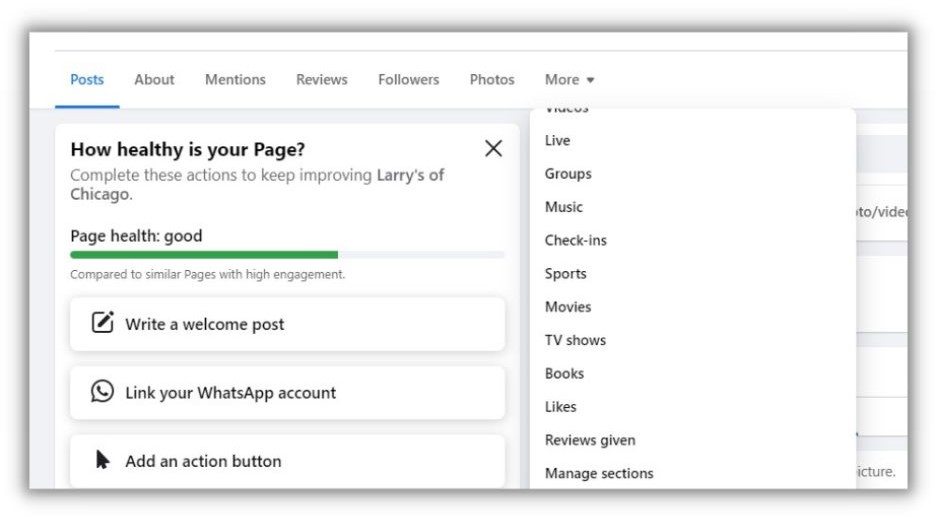
You only want to keep the ones that are relevant to your business so it’s easier for people to find what they want. To make those selections, click “Manage sections.” You’ll get another popup window that lets you unclick tabs to remove them from your page.
Turn on reviews
Reviews are critical for building trust with potential customers. To make sure this feature is turned on for your new page, go to:
- Your account by clicking on your profile picture in the upper right
- Settings and Privacy from the dropdown
- Settings from the next drop down
- Privacy from the left-side menu
- Page and Tagging from the left side menu
- Make sure “Allow others to view and leave reviews on your Page” is toggled on
When your Page is new, you won’t have any reviews yet. To fix that, here are 22 ways to ask for reviews from your customers. And here’s how to respond to negative reviews on the off chance you get some.
Facebook Business Account FAQs
Here are answers to some of the most common questions we hear about Facebook Business Accounts.
Are Facebook Business Accounts free?
Yes. Just like personal pages, there is no charge to create a Facebook Business Account. You can post, share, and comment from your free account. What does cost money are Facebook Ads and boosted posts.
Is there a difference between a personal and a business Facebook account?
Yes, a business account and a personal account on Facebook have a few differences. For example, a business account has many more tabs that allow you to add a menu, a shop, and several other features not available on a personal account.
Does a Facebook Business Account need to be attached to a personal account?
Yes, you can’t get a freestanding Facebook Business Account. You first need to establish a personal account that links to your Business Page.
You can create a new personal account using a different email address, like one from work, and use that to create a Business Page if you’d like to keep it separate.
Promote your Facebook Business Page
A Facebook Business Page is a big leap in expanding your online presence. But a Page without promotion is like a storefront without a sign. Sure, anyone could stumble in by accident, but they’d probably never find you on purpose.
Facebook ads and social media marketing are how you turn a shiny new Facebook Page into a lead-generation tool that accelerates your business growth. And compared to digital marketing costs in general, Facebook ads are an affordable option within reach of most organizations.
The post 7 Simple Steps to Create a Facebook Business Page (+Tips to Make It More Engaging) appeared first on WordStream.


Recent Comments